The Journey So Far
My bookbinding journey began early in my life. I was instilled with a love of reading from day one. My mother is a voracious reader, sometimes reading two or three books a day without fail, every day. Her kindle library is colossal. My mom’s family friend “Aunt” Karen avidly encouraged me to read, and bought me books for every gift giving occasion. My father’s sister Pat was a librarian, and my cousin/her daughter Lia would go on to become a librarian as well. My family circle made it clear that reading was important and valuable and that books were a treasure.
The first time I learned about bookbinding as an art was when I came home after college. My friend Jess was a Book Arts major, and taught me how to coptic stitch and make accordion books, something she is still known for. I used these skills to make a smattering of small journals and notebooks, and book-related art projects. I promptly forgot about this for nearly 10 years.
Just before the pandemic hit, I worked alongside another maker and prop artist to recreate the famous Journals from Gravity Falls. I fell in love again with the whole process. I made myself make-shift tools from spare wood, but wished I had the real thing. I stained each page to age them, sewed them dutifully, trimmed and bound them together with leather. I found perfect accessories and applied them with care. But once the project was over, all I wanted to do was make another one, a better one, with the proper tools and materials.
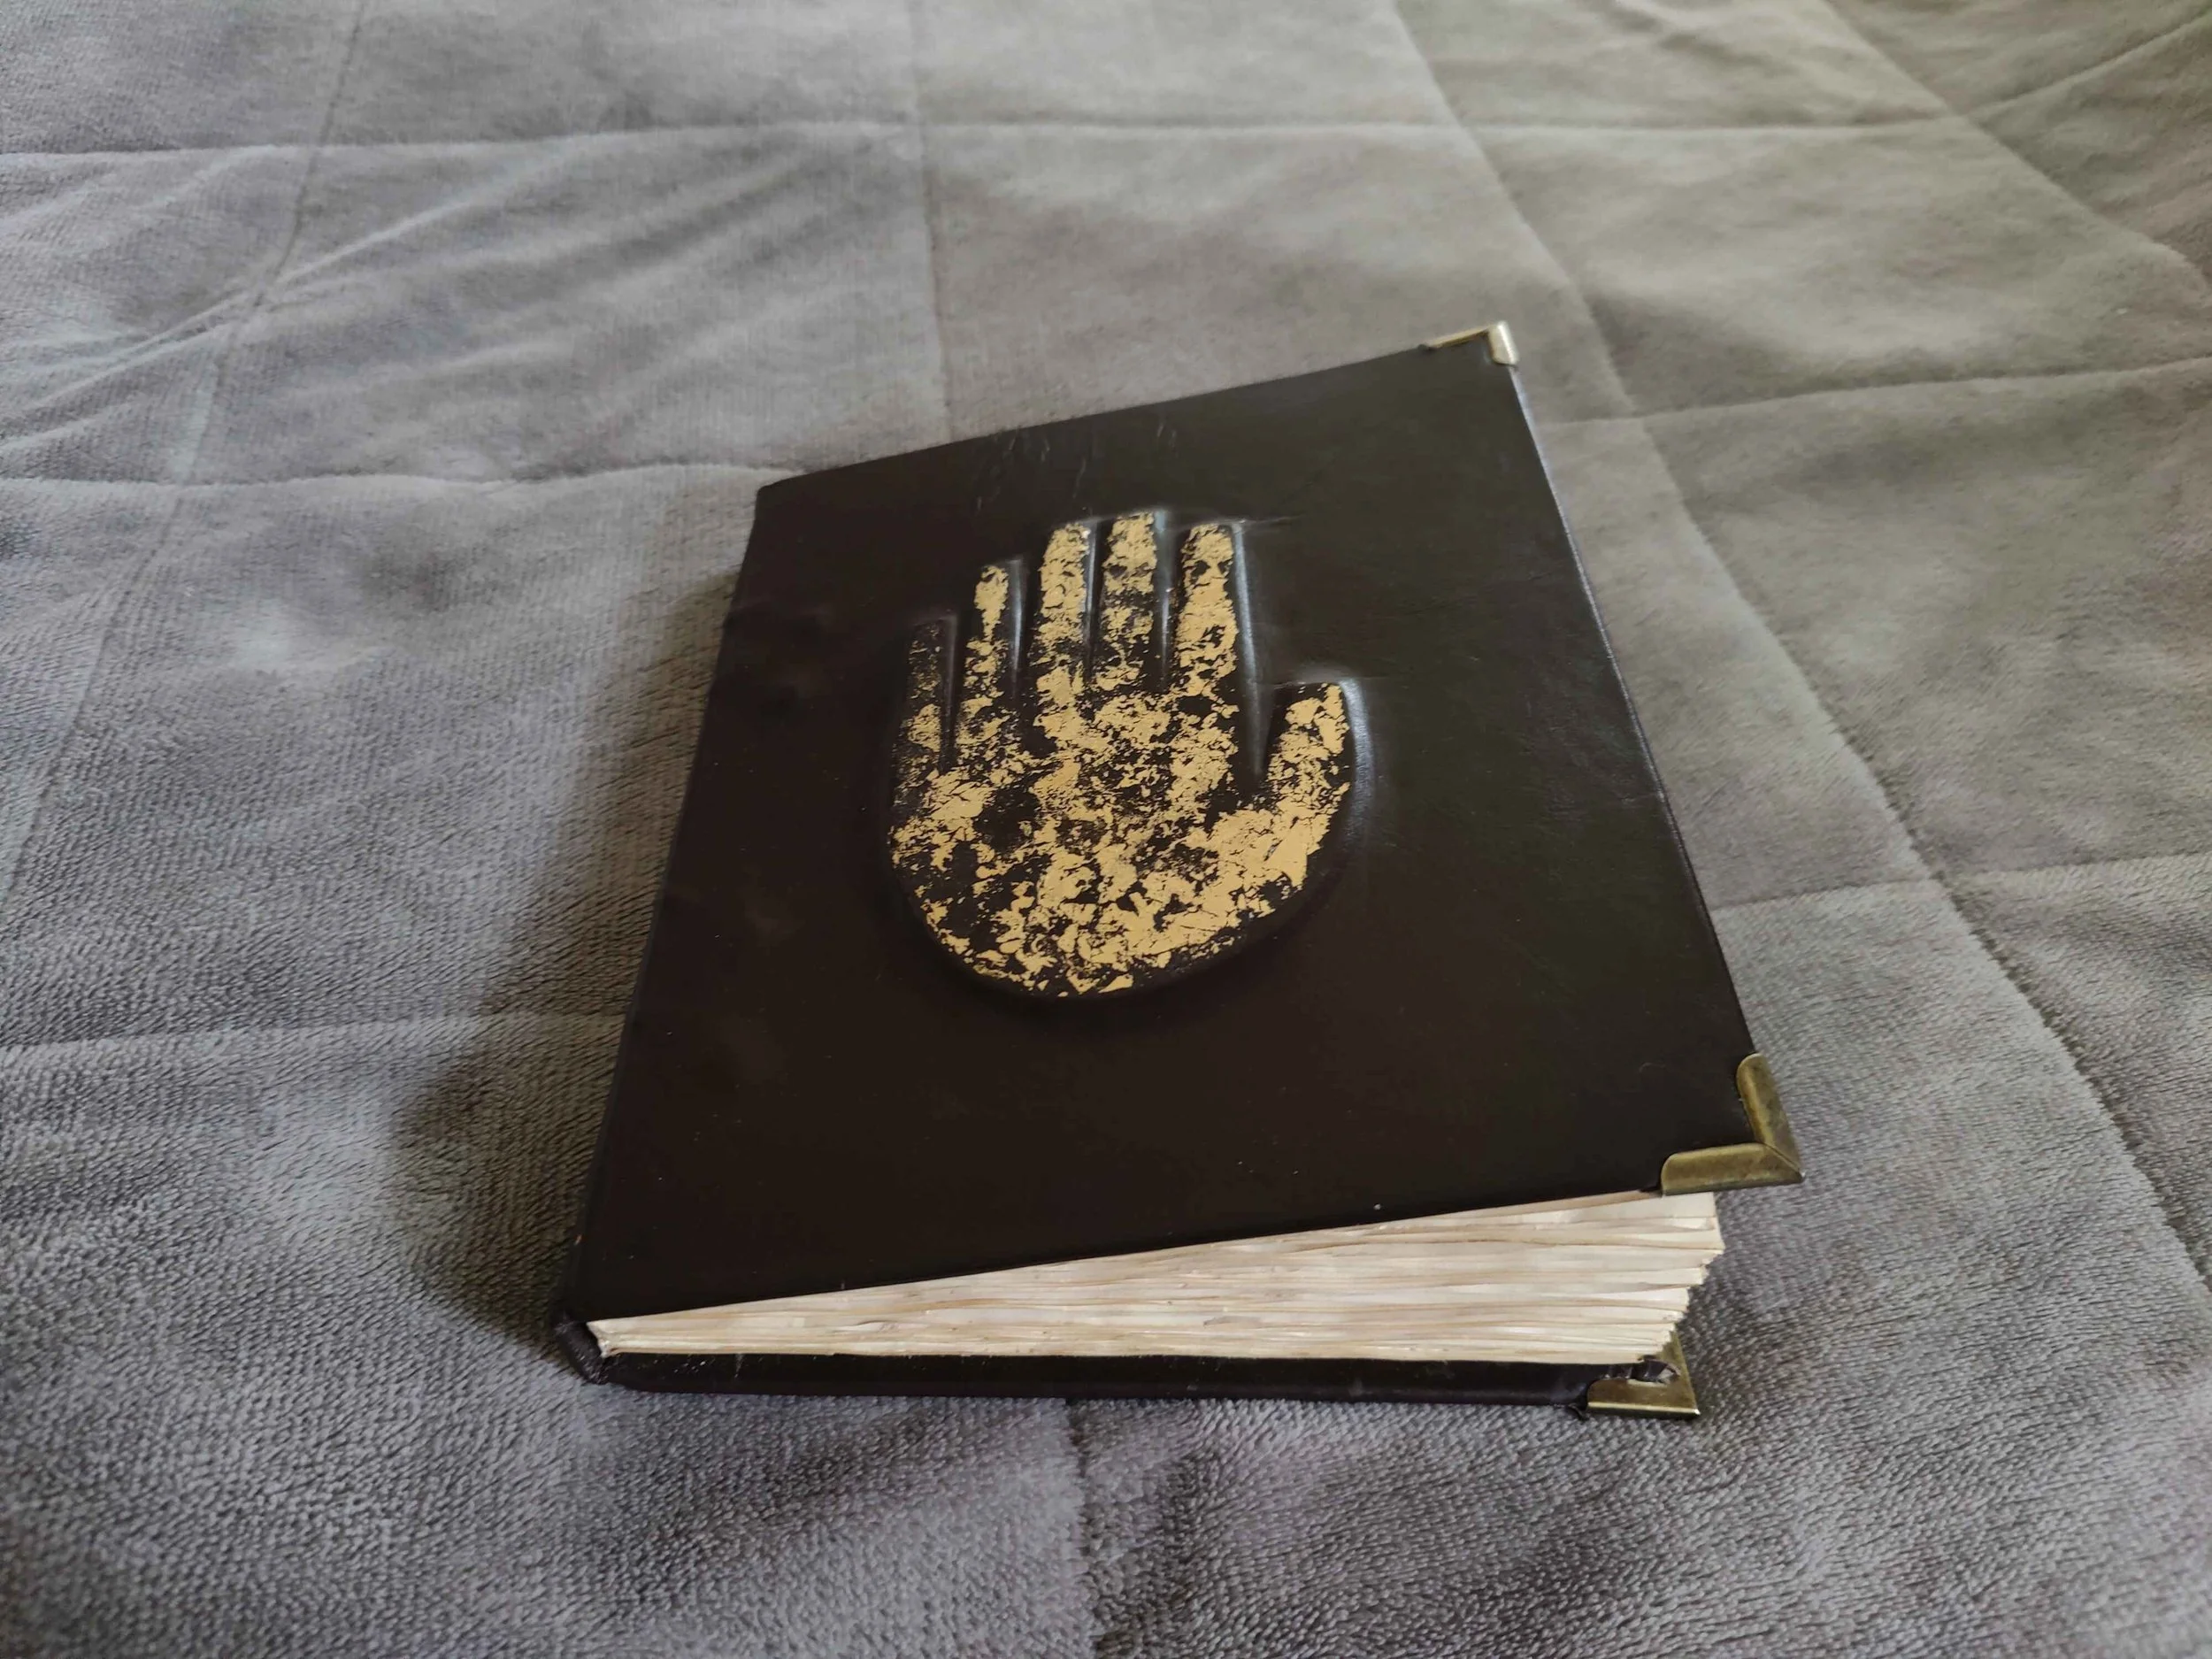
Gravity Falls Journal
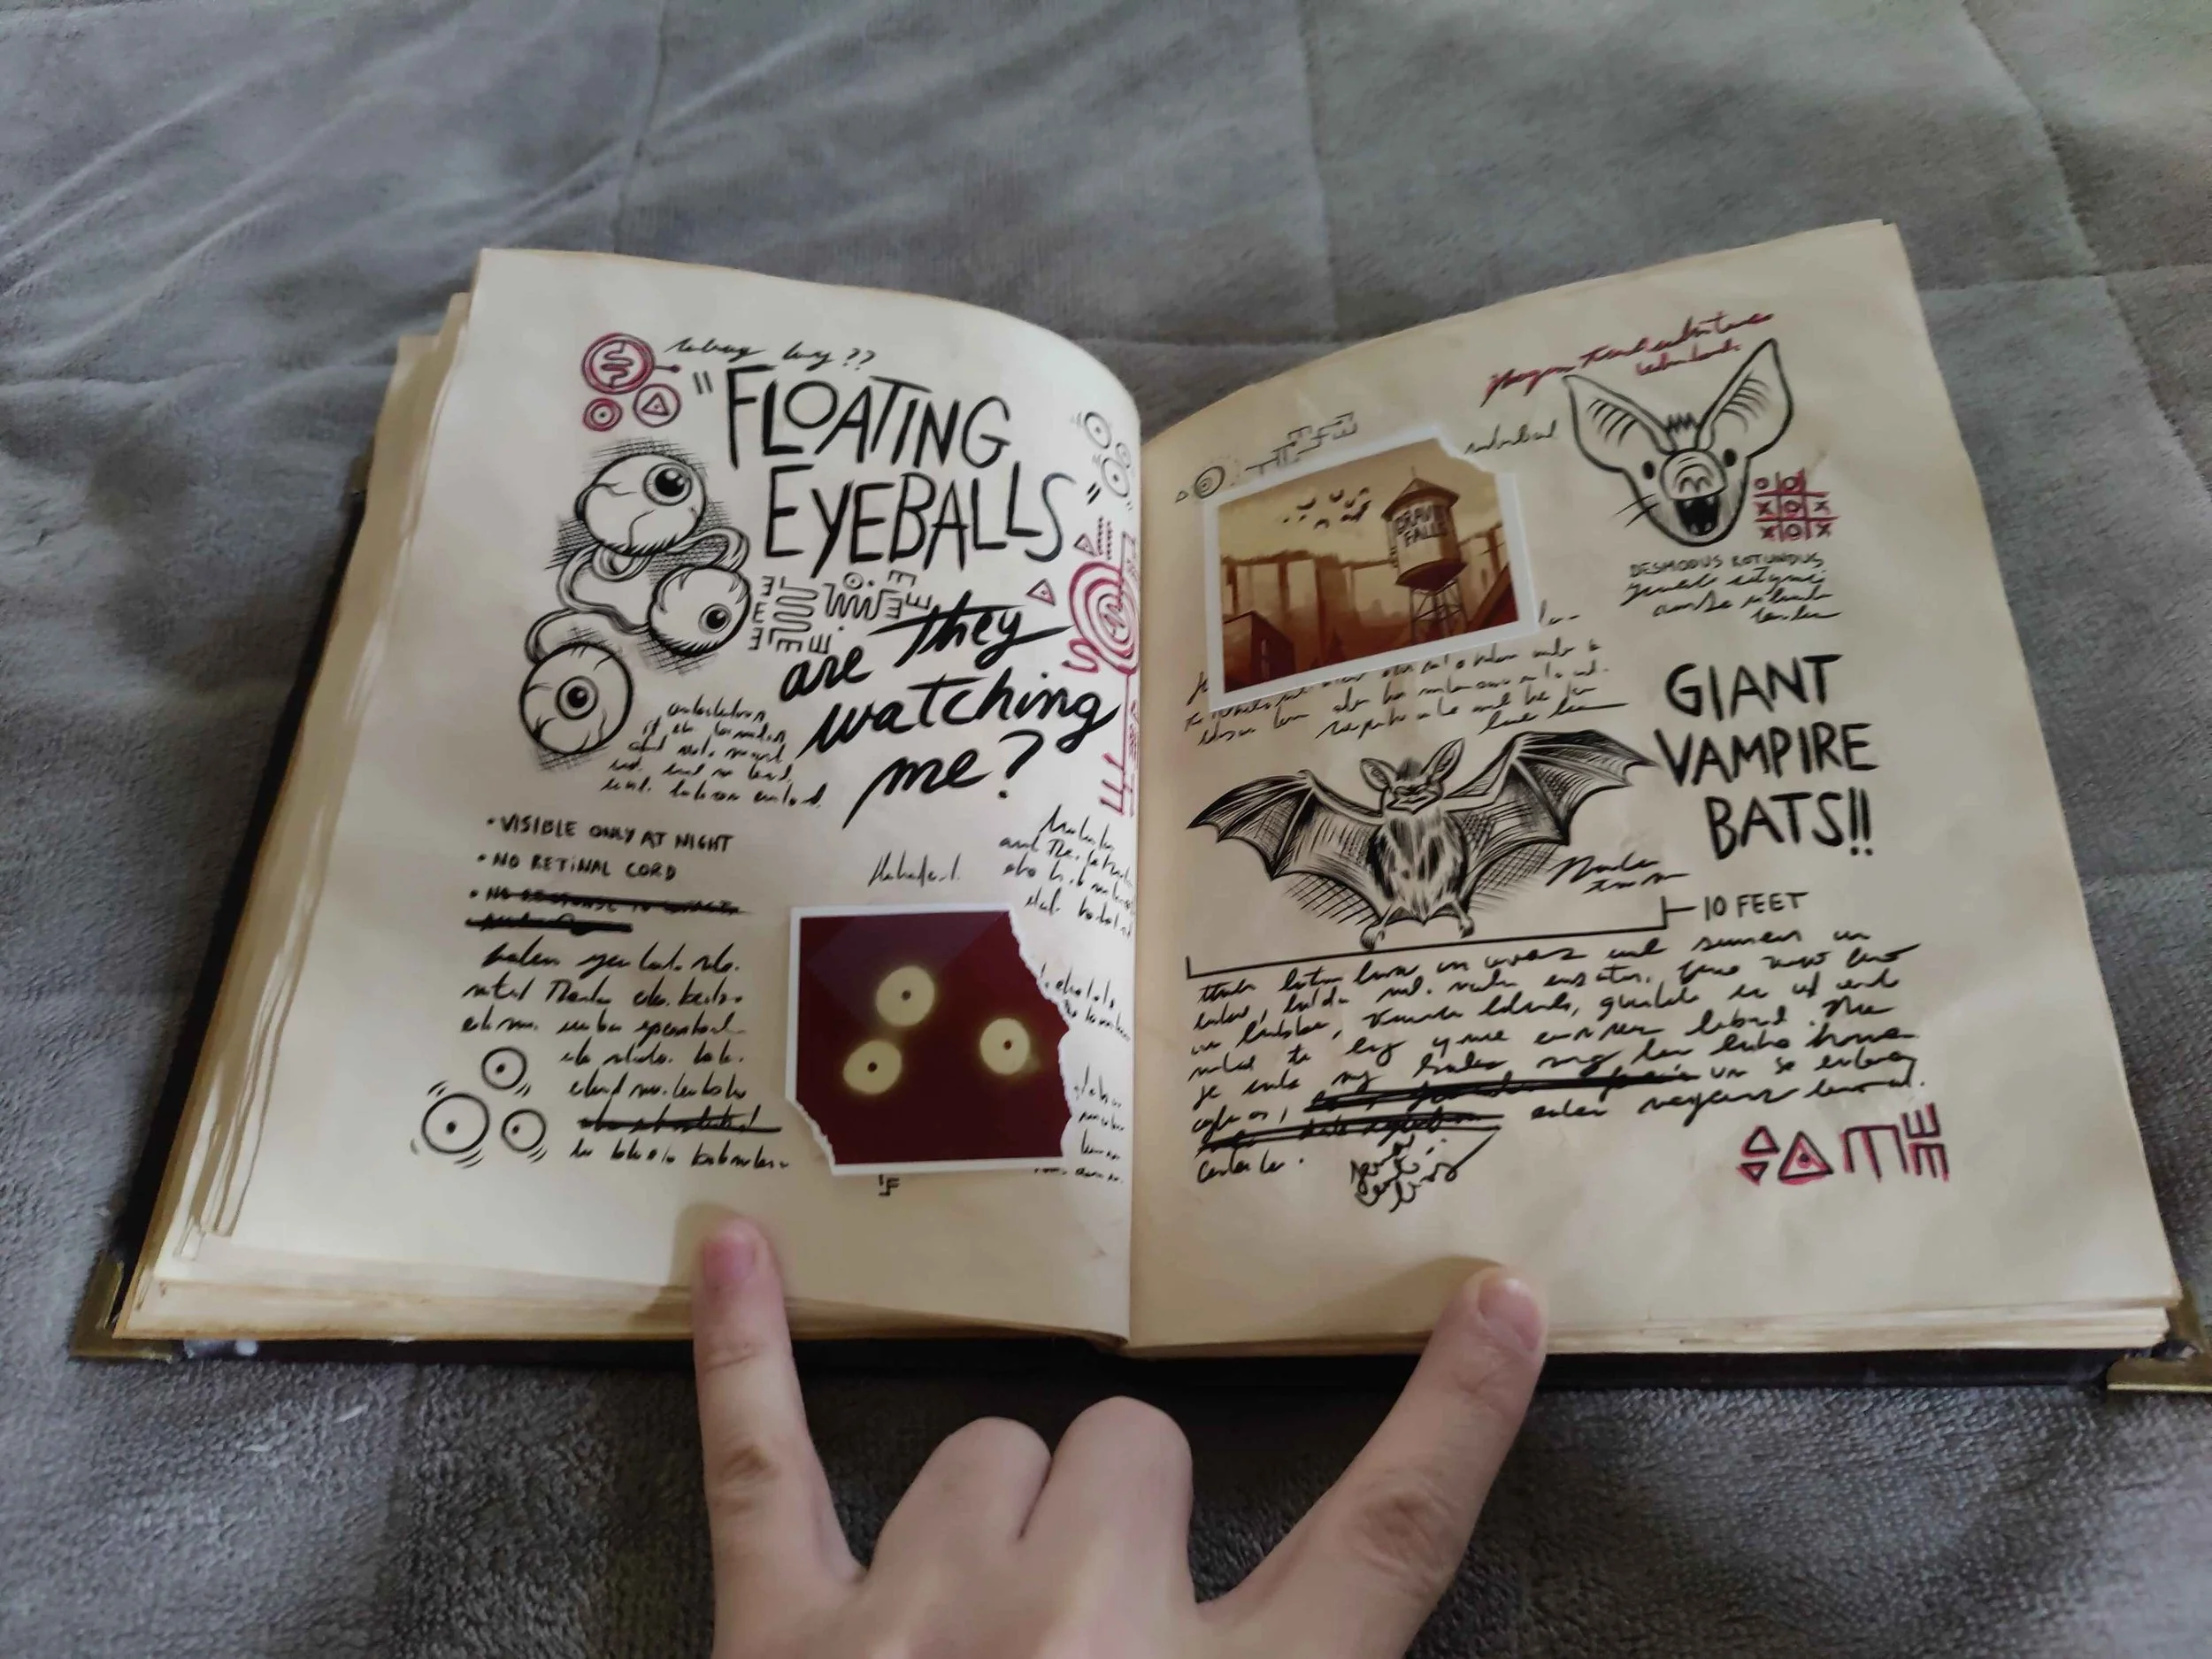
Gravity Falls Journal interior.
Ever since then the idea of designing my own tools had been rattling around in my head. I had taught myself 3D modelling before for other projects, and in the fall of 2024 I fired up Fusion360 and got working. My first iterations were a fusion of original woodworking plans for presses from an 1800s bookbinder’s manual and a modern moxxon vice.
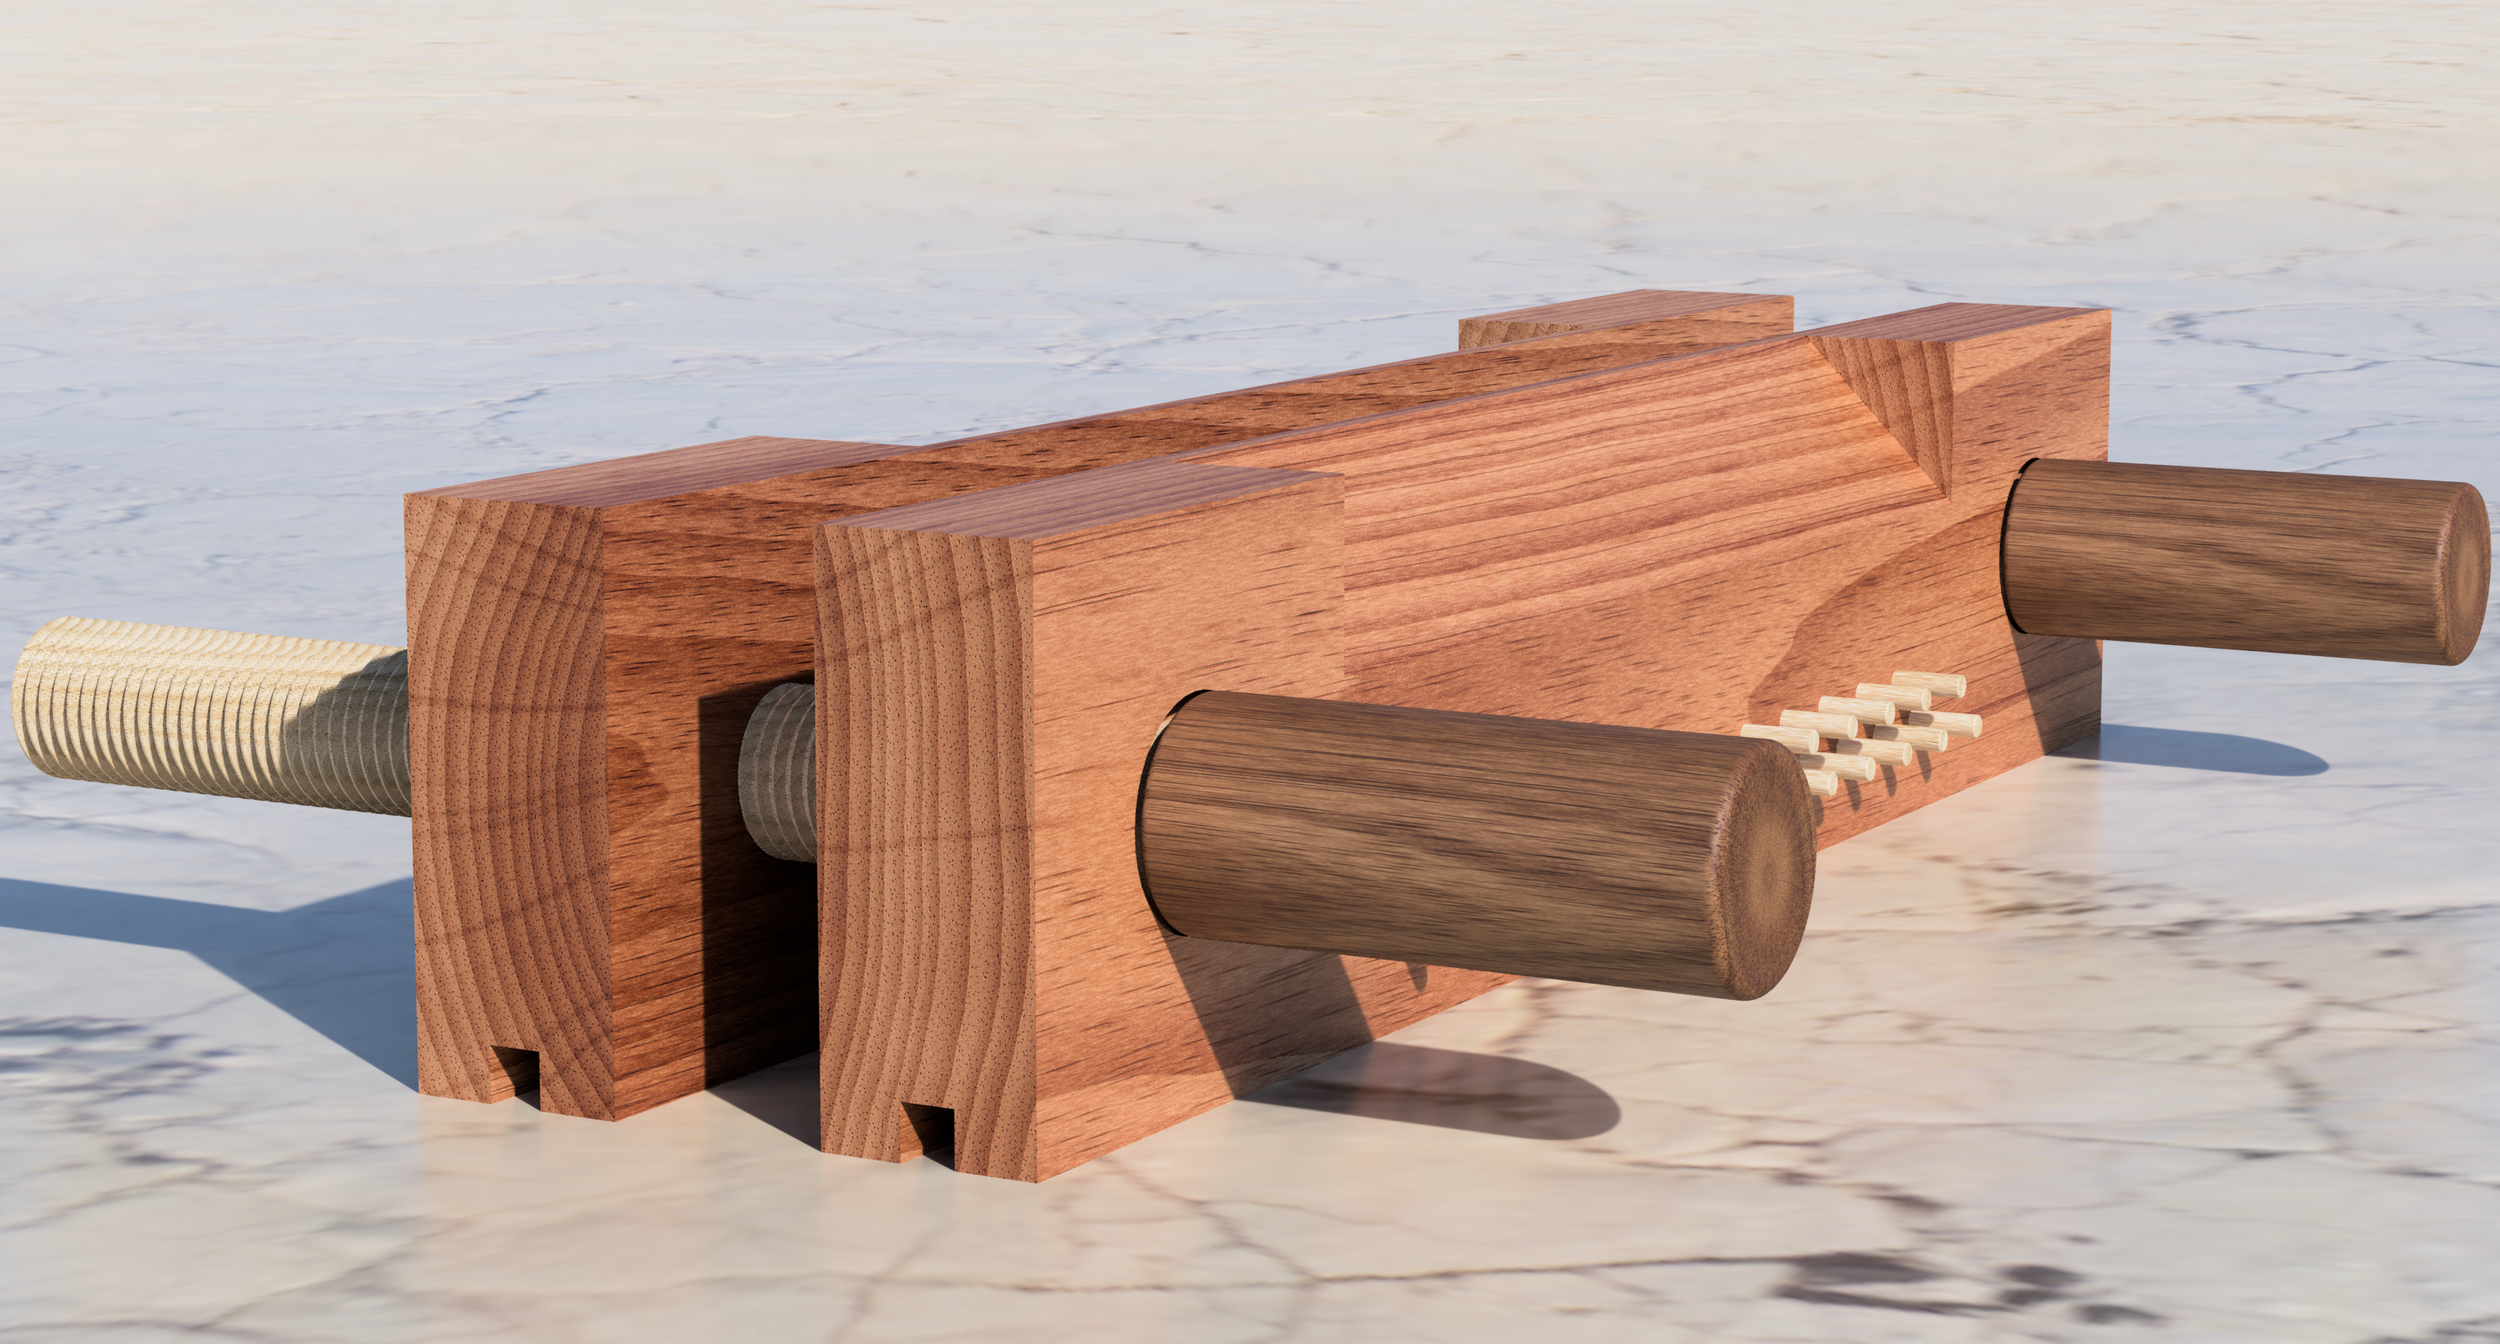
The first iteration press.
Versions 2 and 3 were a little better. I changed the screw handles to a vice-like head, captured the face of the press with a block, and other small changes.
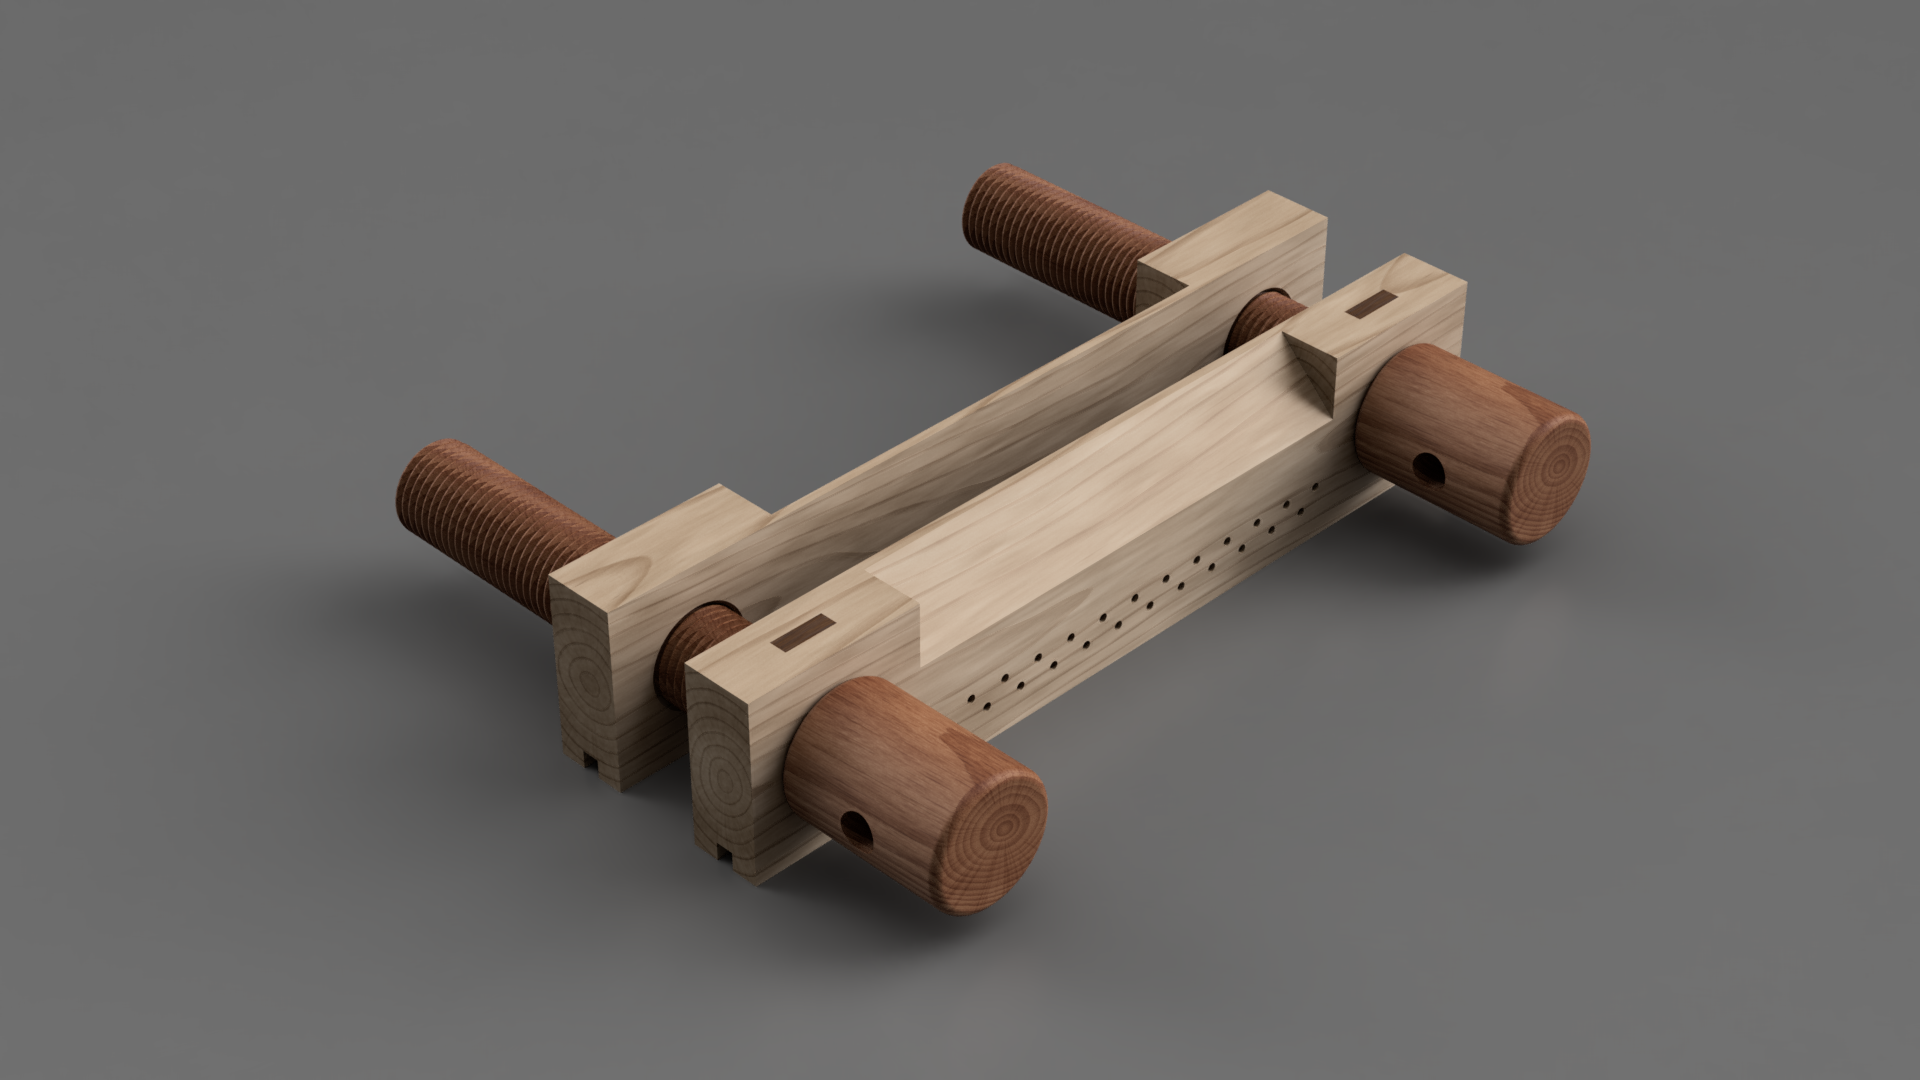
Version 3 with larger screws.
Around this time I reached out to other makers for advice. I got in touch with a toolmaker that fabricates similar vices and had the tooling to make complicated wooden lead screws. He told me his setup was a completely custom, and costly CNC turning apparatus. Looking into it further, it was prohibitively expensive to go in this direction.
I wanted to be able to use some off-the-shelf parts to keep costs and manufacturing time to a minimum. About this time I focused my efforts on ACME style lead screws and their hardware. The new designs would call for an ACME lead screw, a bushing, and a flange nut to move along the screw. I used parts right from McMaster Carr’s website.
Version 4. Starting to look fancy.
This is where the press took on the first inklings of it’s final form. It goes back to a floating, non-captured face. It had a 1in/25cm ACME lead screw, and metal turning handles and knobs. The plough blade is seated directly against a bare wood dovetail. The lead screw would remain largely unchanged throughout this development process, but around this time I also designed a basin to house the press and plough when in use.
This is when I discovered the wonderful online community of bookbinders over at r/bookbinding. They became a wealth of advice and knowledge as I honed my designs, and I spent many hours on their Discord server asking questions. Their help pushed the designs forward leaps and bounds. I quickly iterated three more designs under their care.
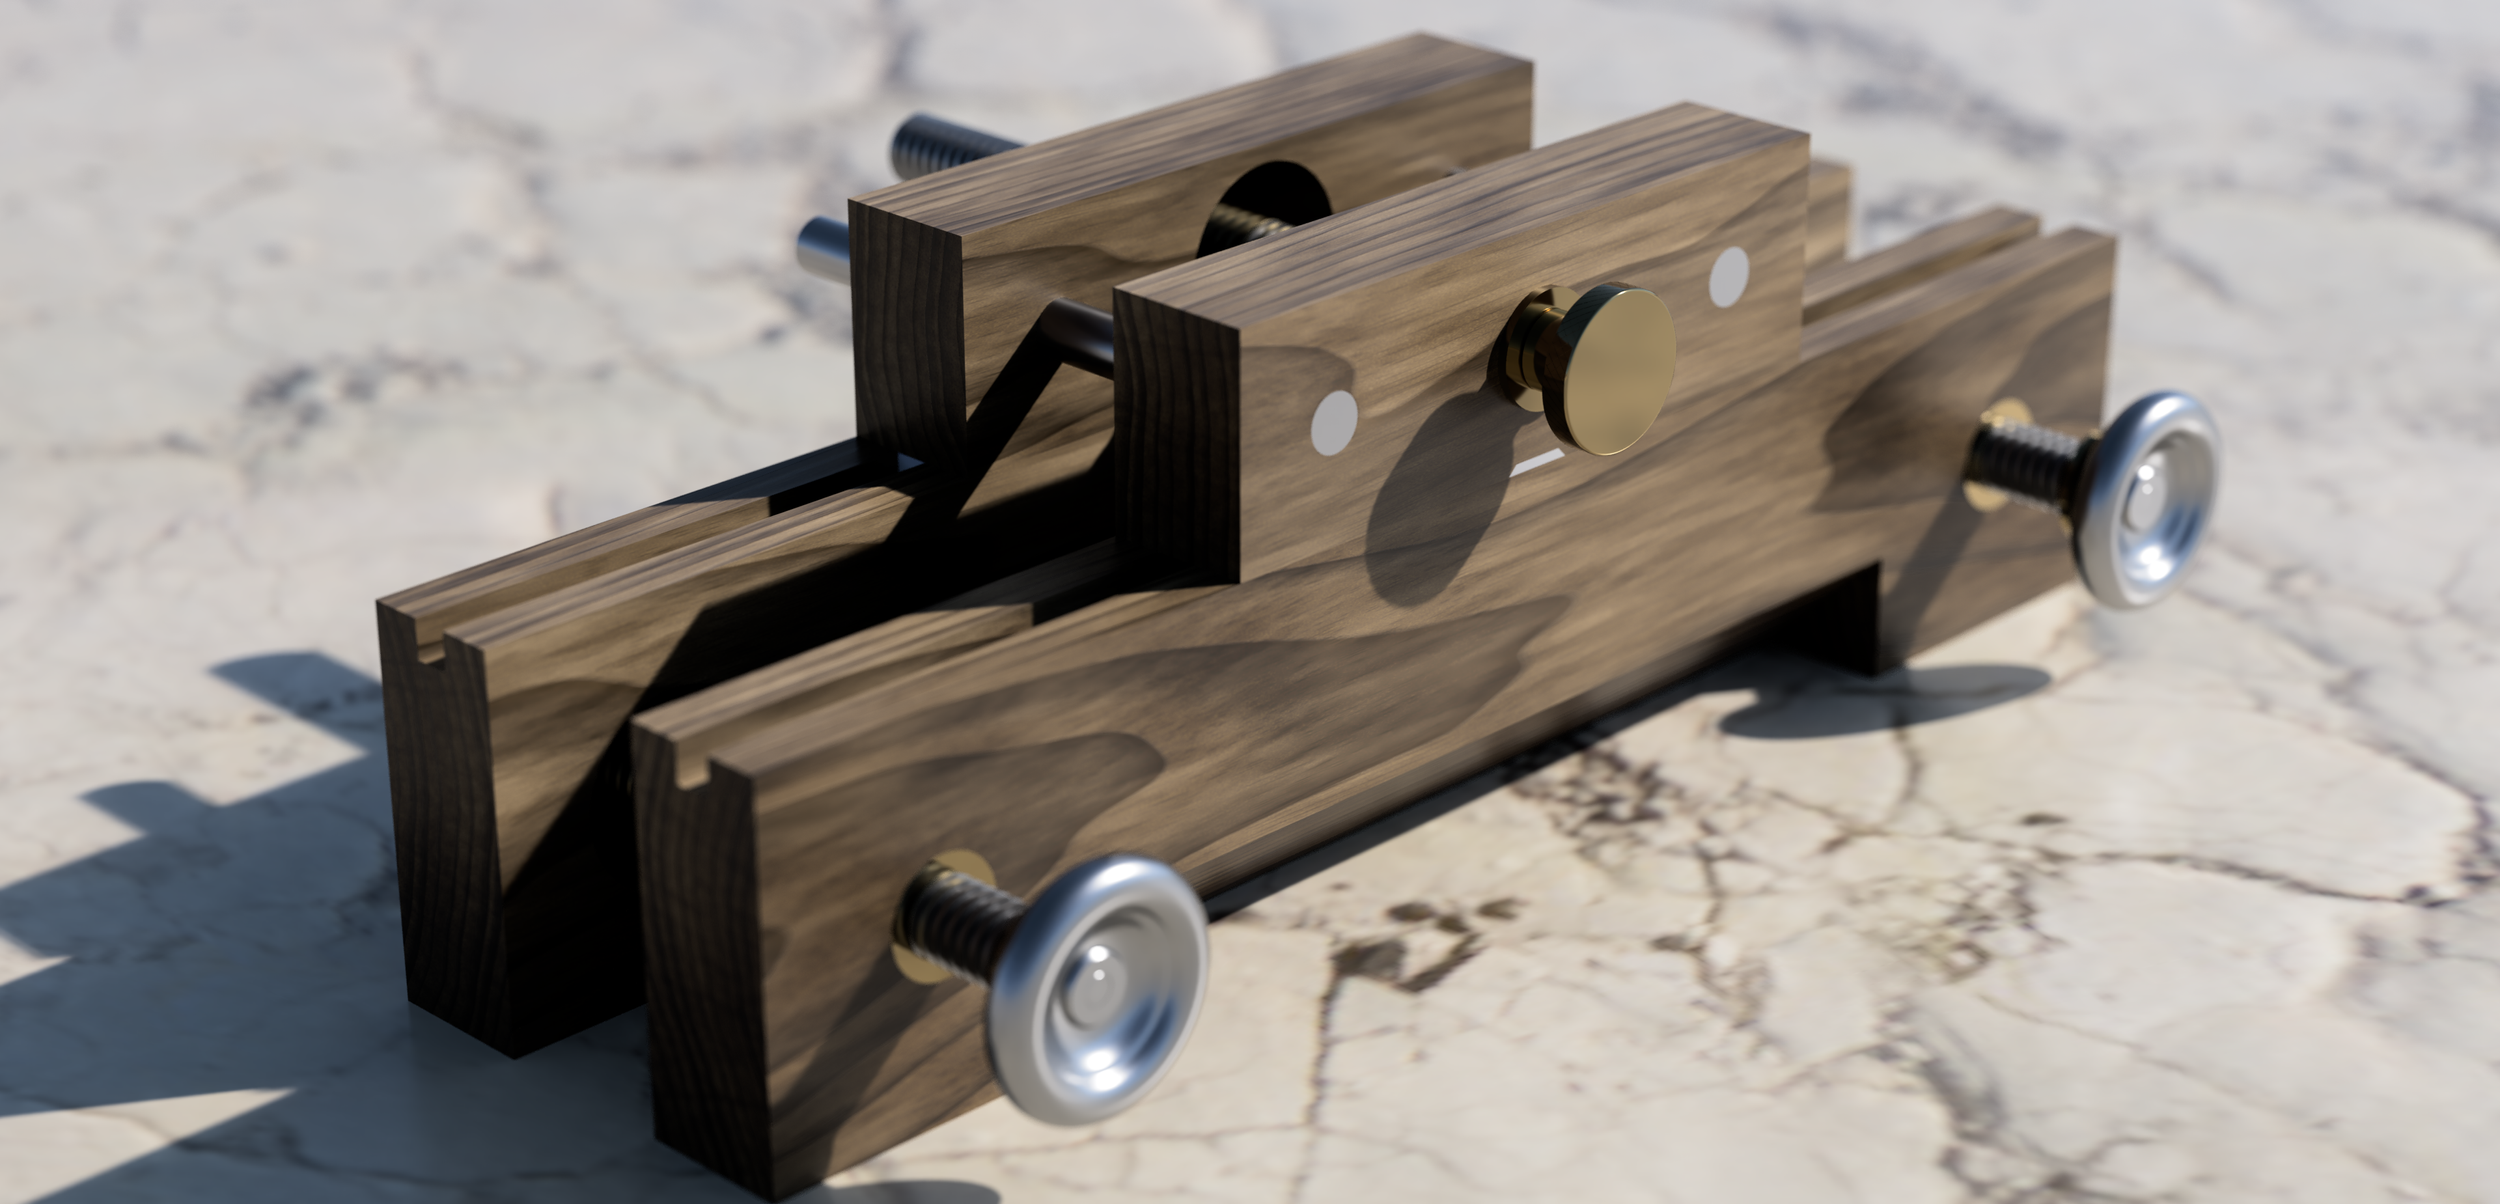
Version 5, first final form.
The vice heads make their return to the press, but a the plough gains a long hexagonal handle. I went with a black walnut and brass theme for the renders, despite knowing that the final kits would be made of hard maple and steel. Tying up pegs are still around, but will vanish soon. The basin makes its appearance in most renders. Accents in the form of fittings and medallions make their first appearance here as well, initially of metal. They would later be changed to Delrin (acetal resin).
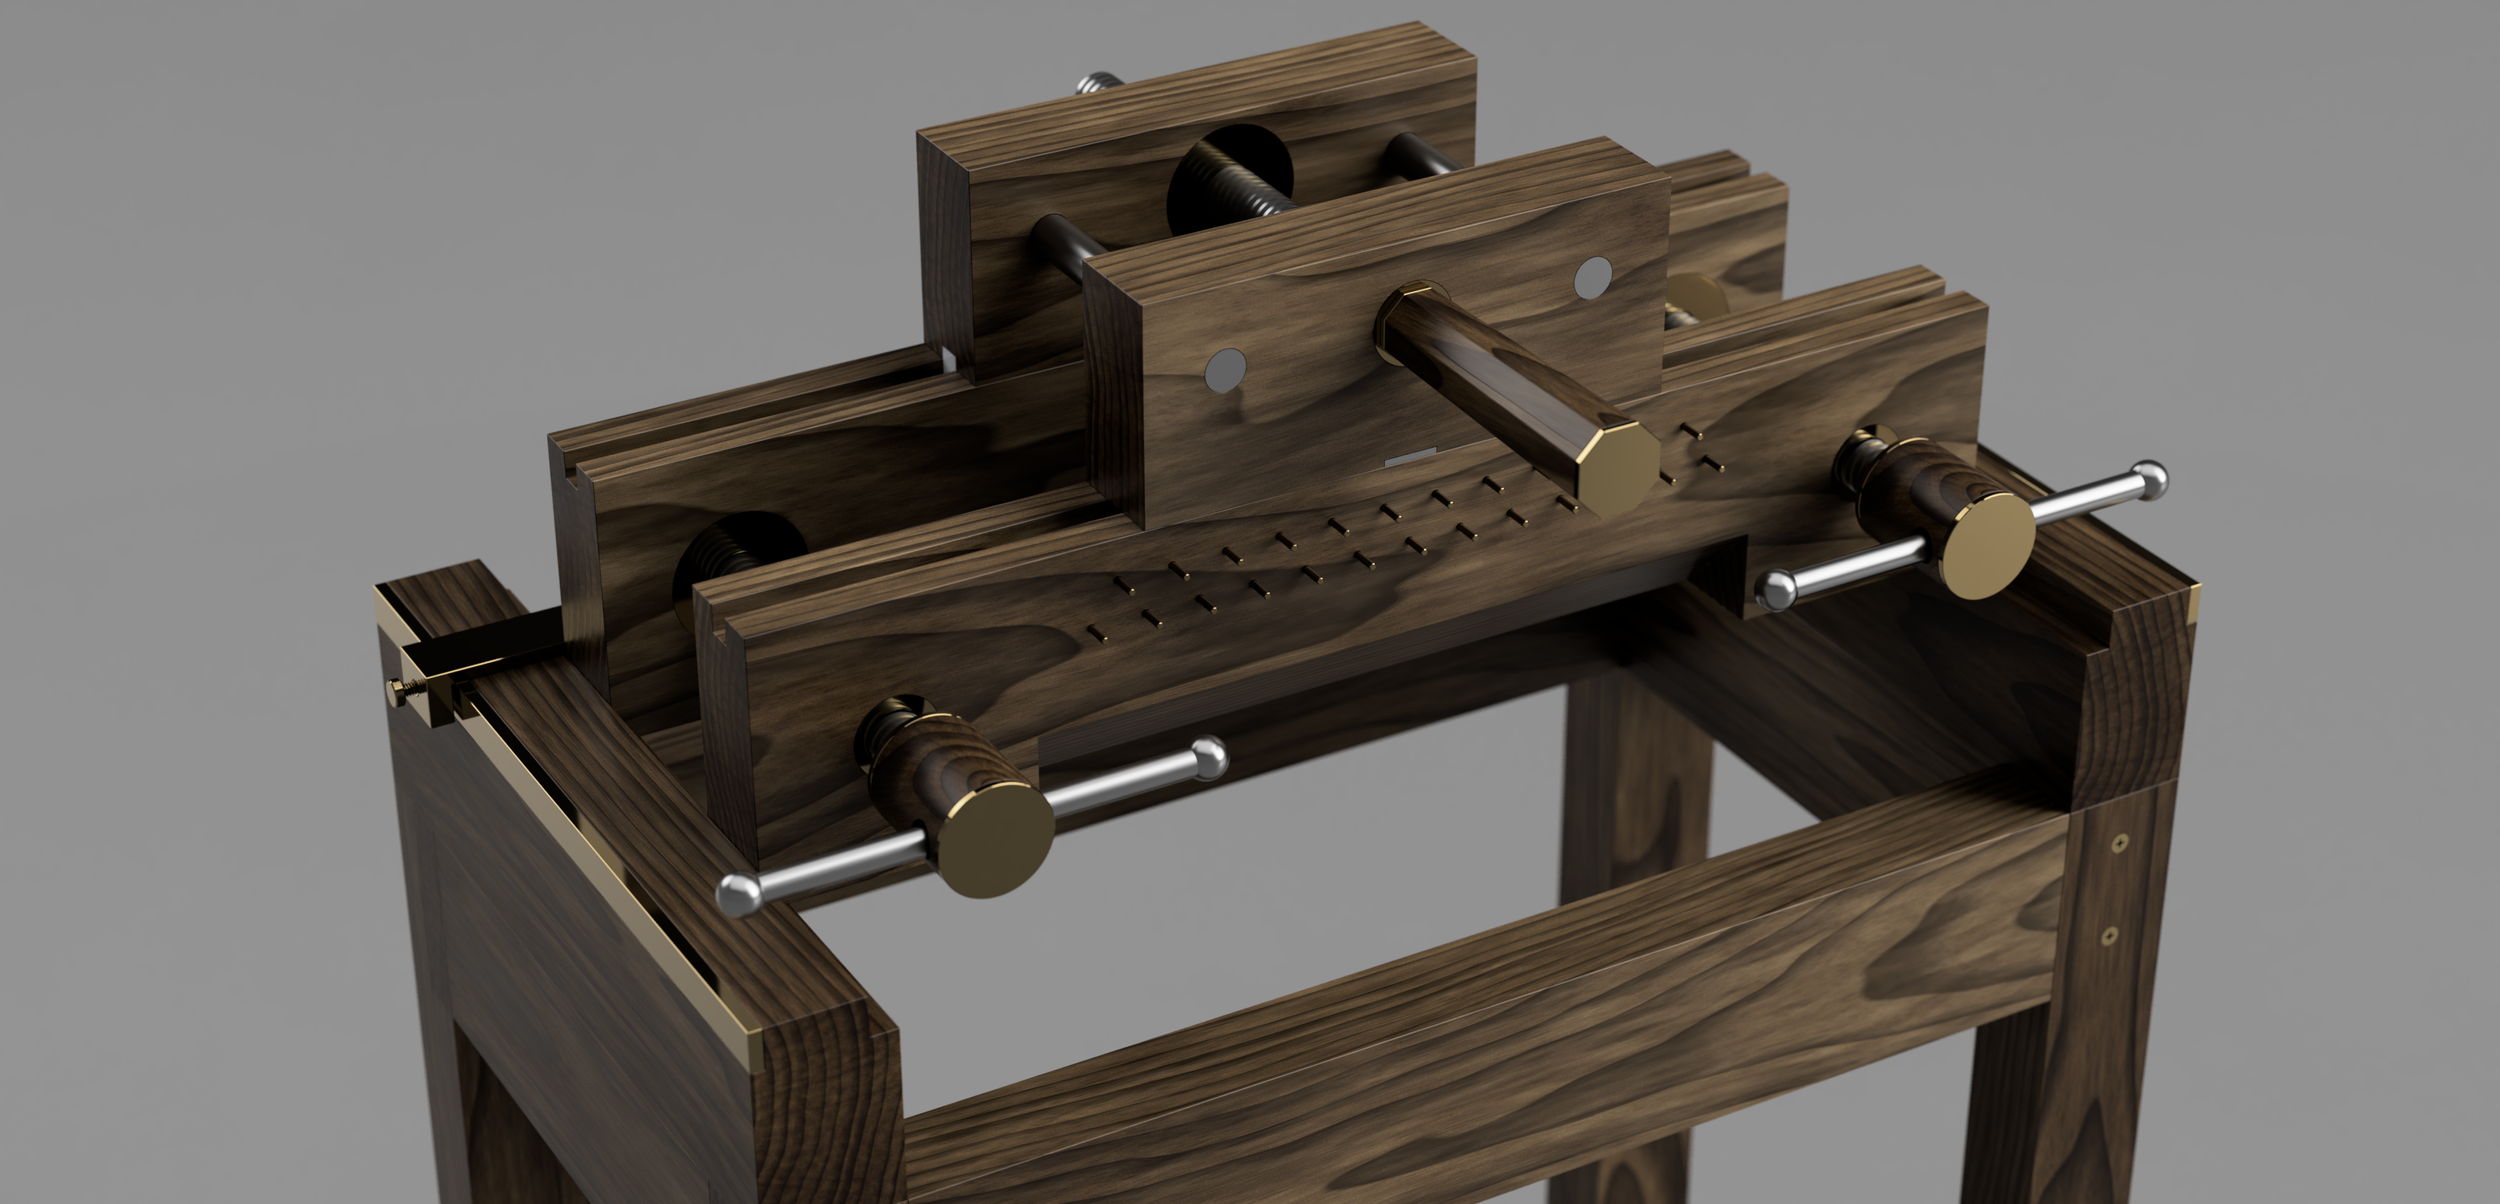
Next I tackled the blade-holder on the plough and some other small details. The blade holder is now a separate unit, with a fitted dovetail to house a newly designed dovetail plough blade.
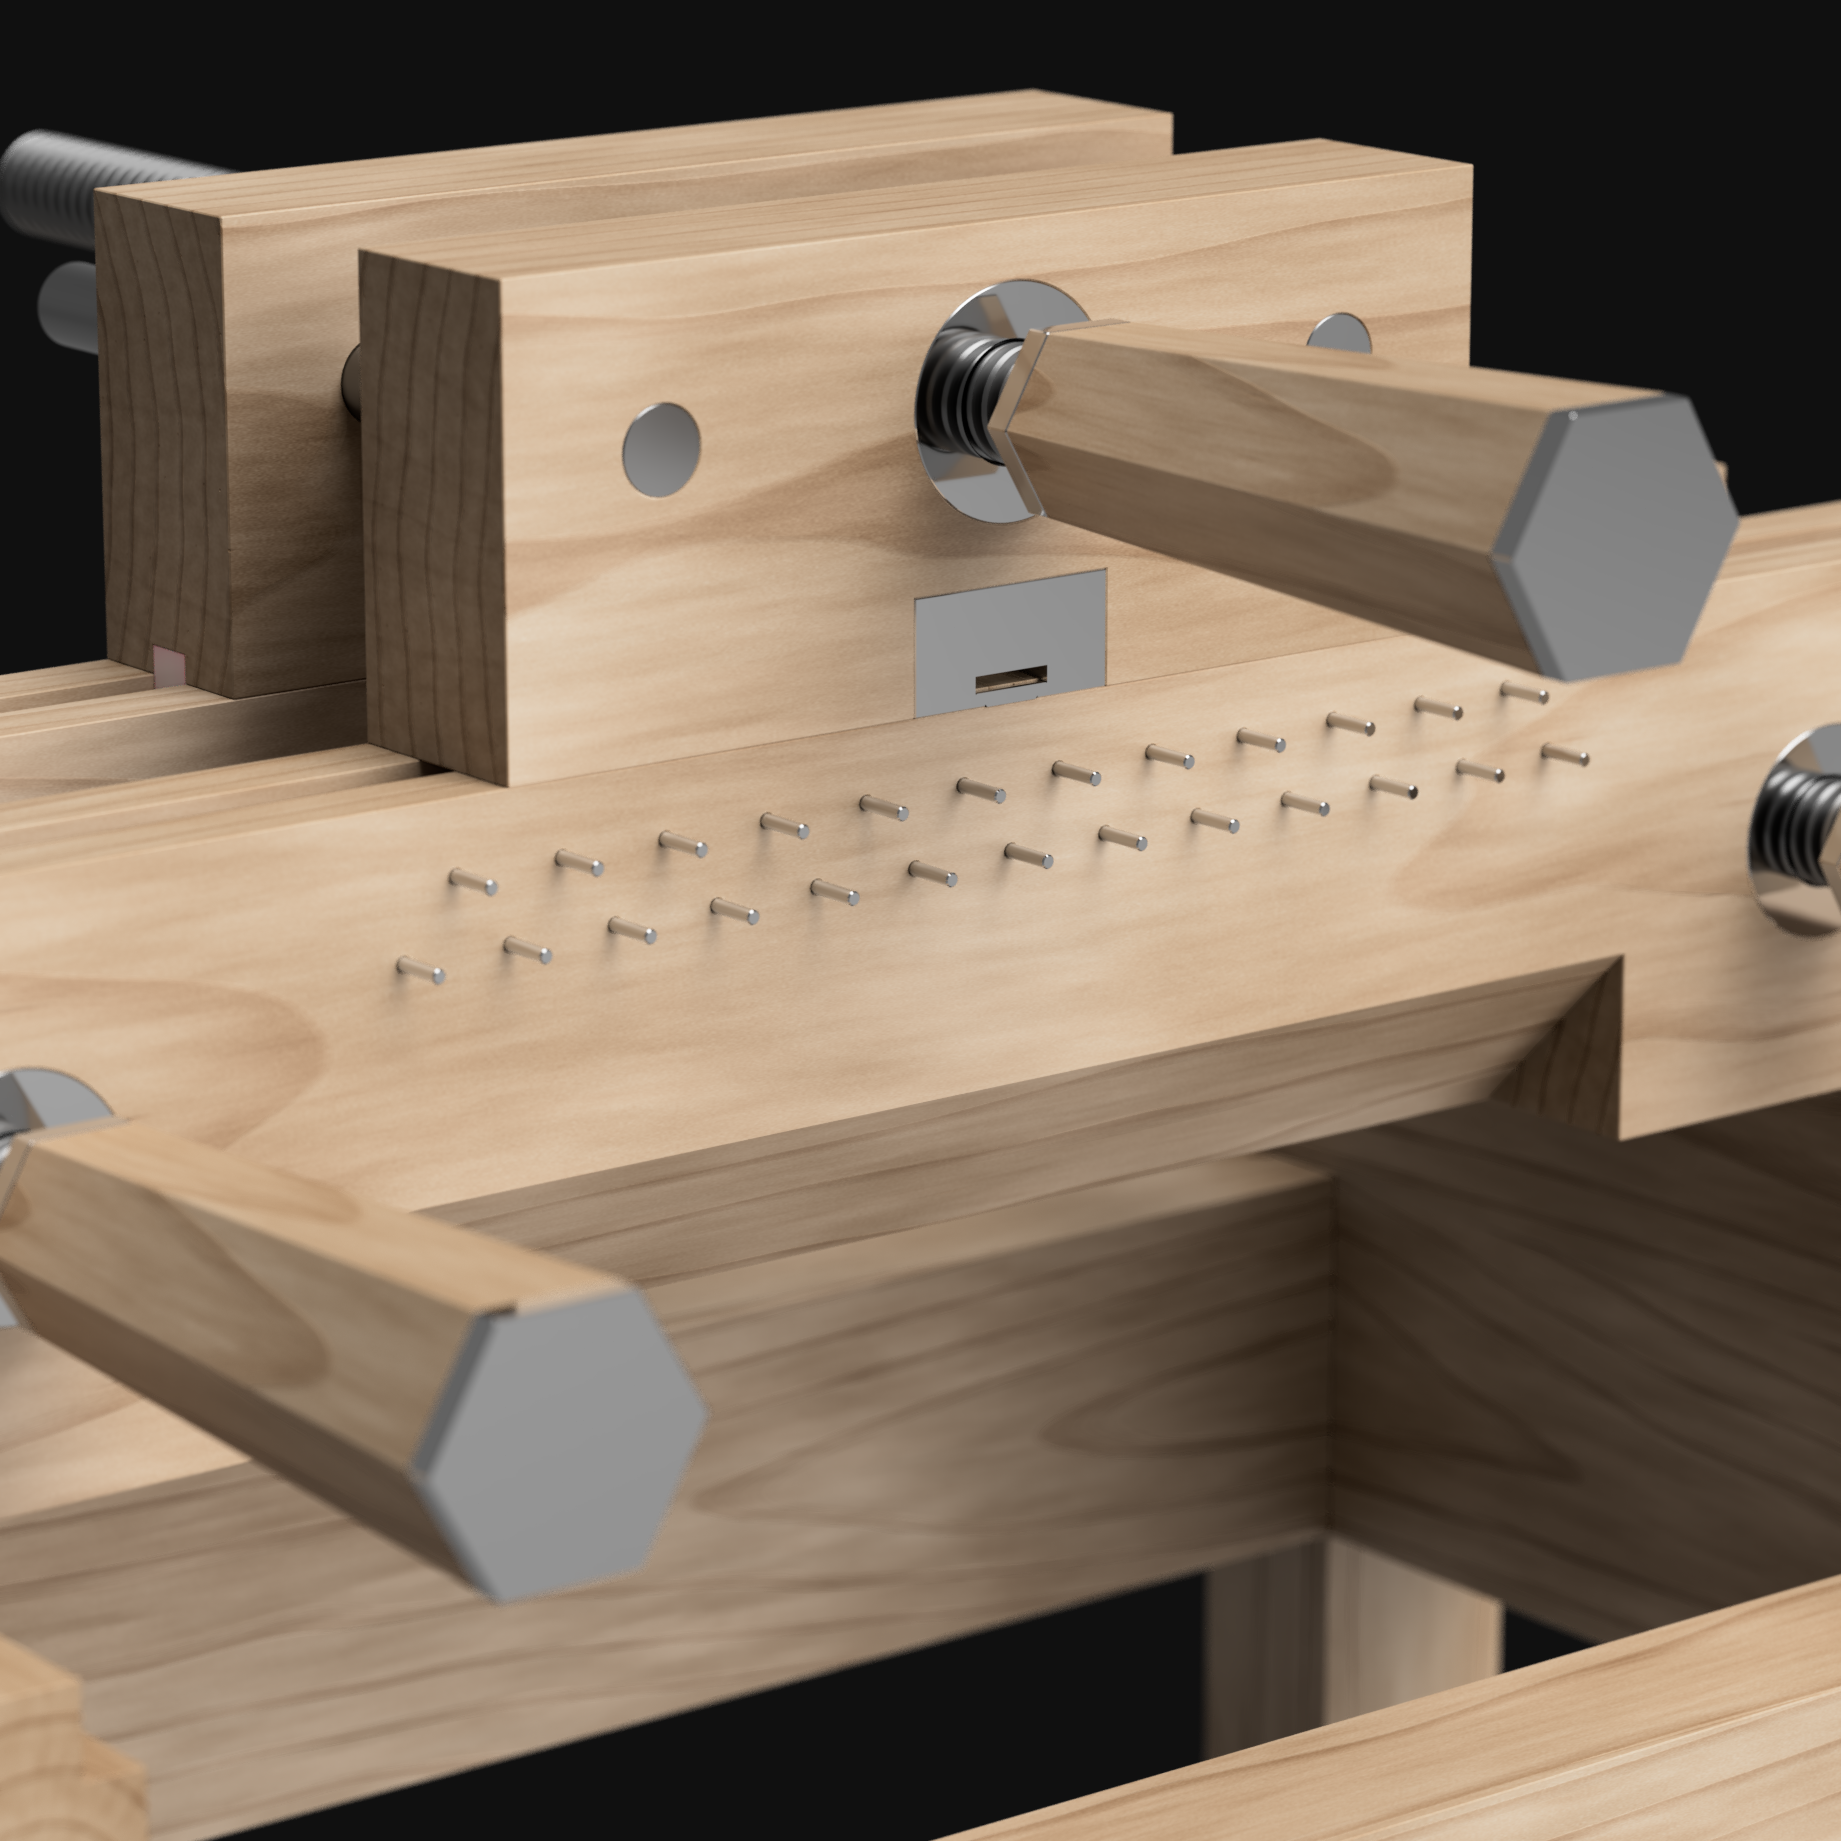
Version 7. Nearly There.
This is where I thought I was done. I spent days rendering each part and assembly from all angles. I called CNC machinist shops to get quotes. I priced out the lumber costs and calculated the time required. I rented time at a local woodshop and hand-built a prototype press and plough.
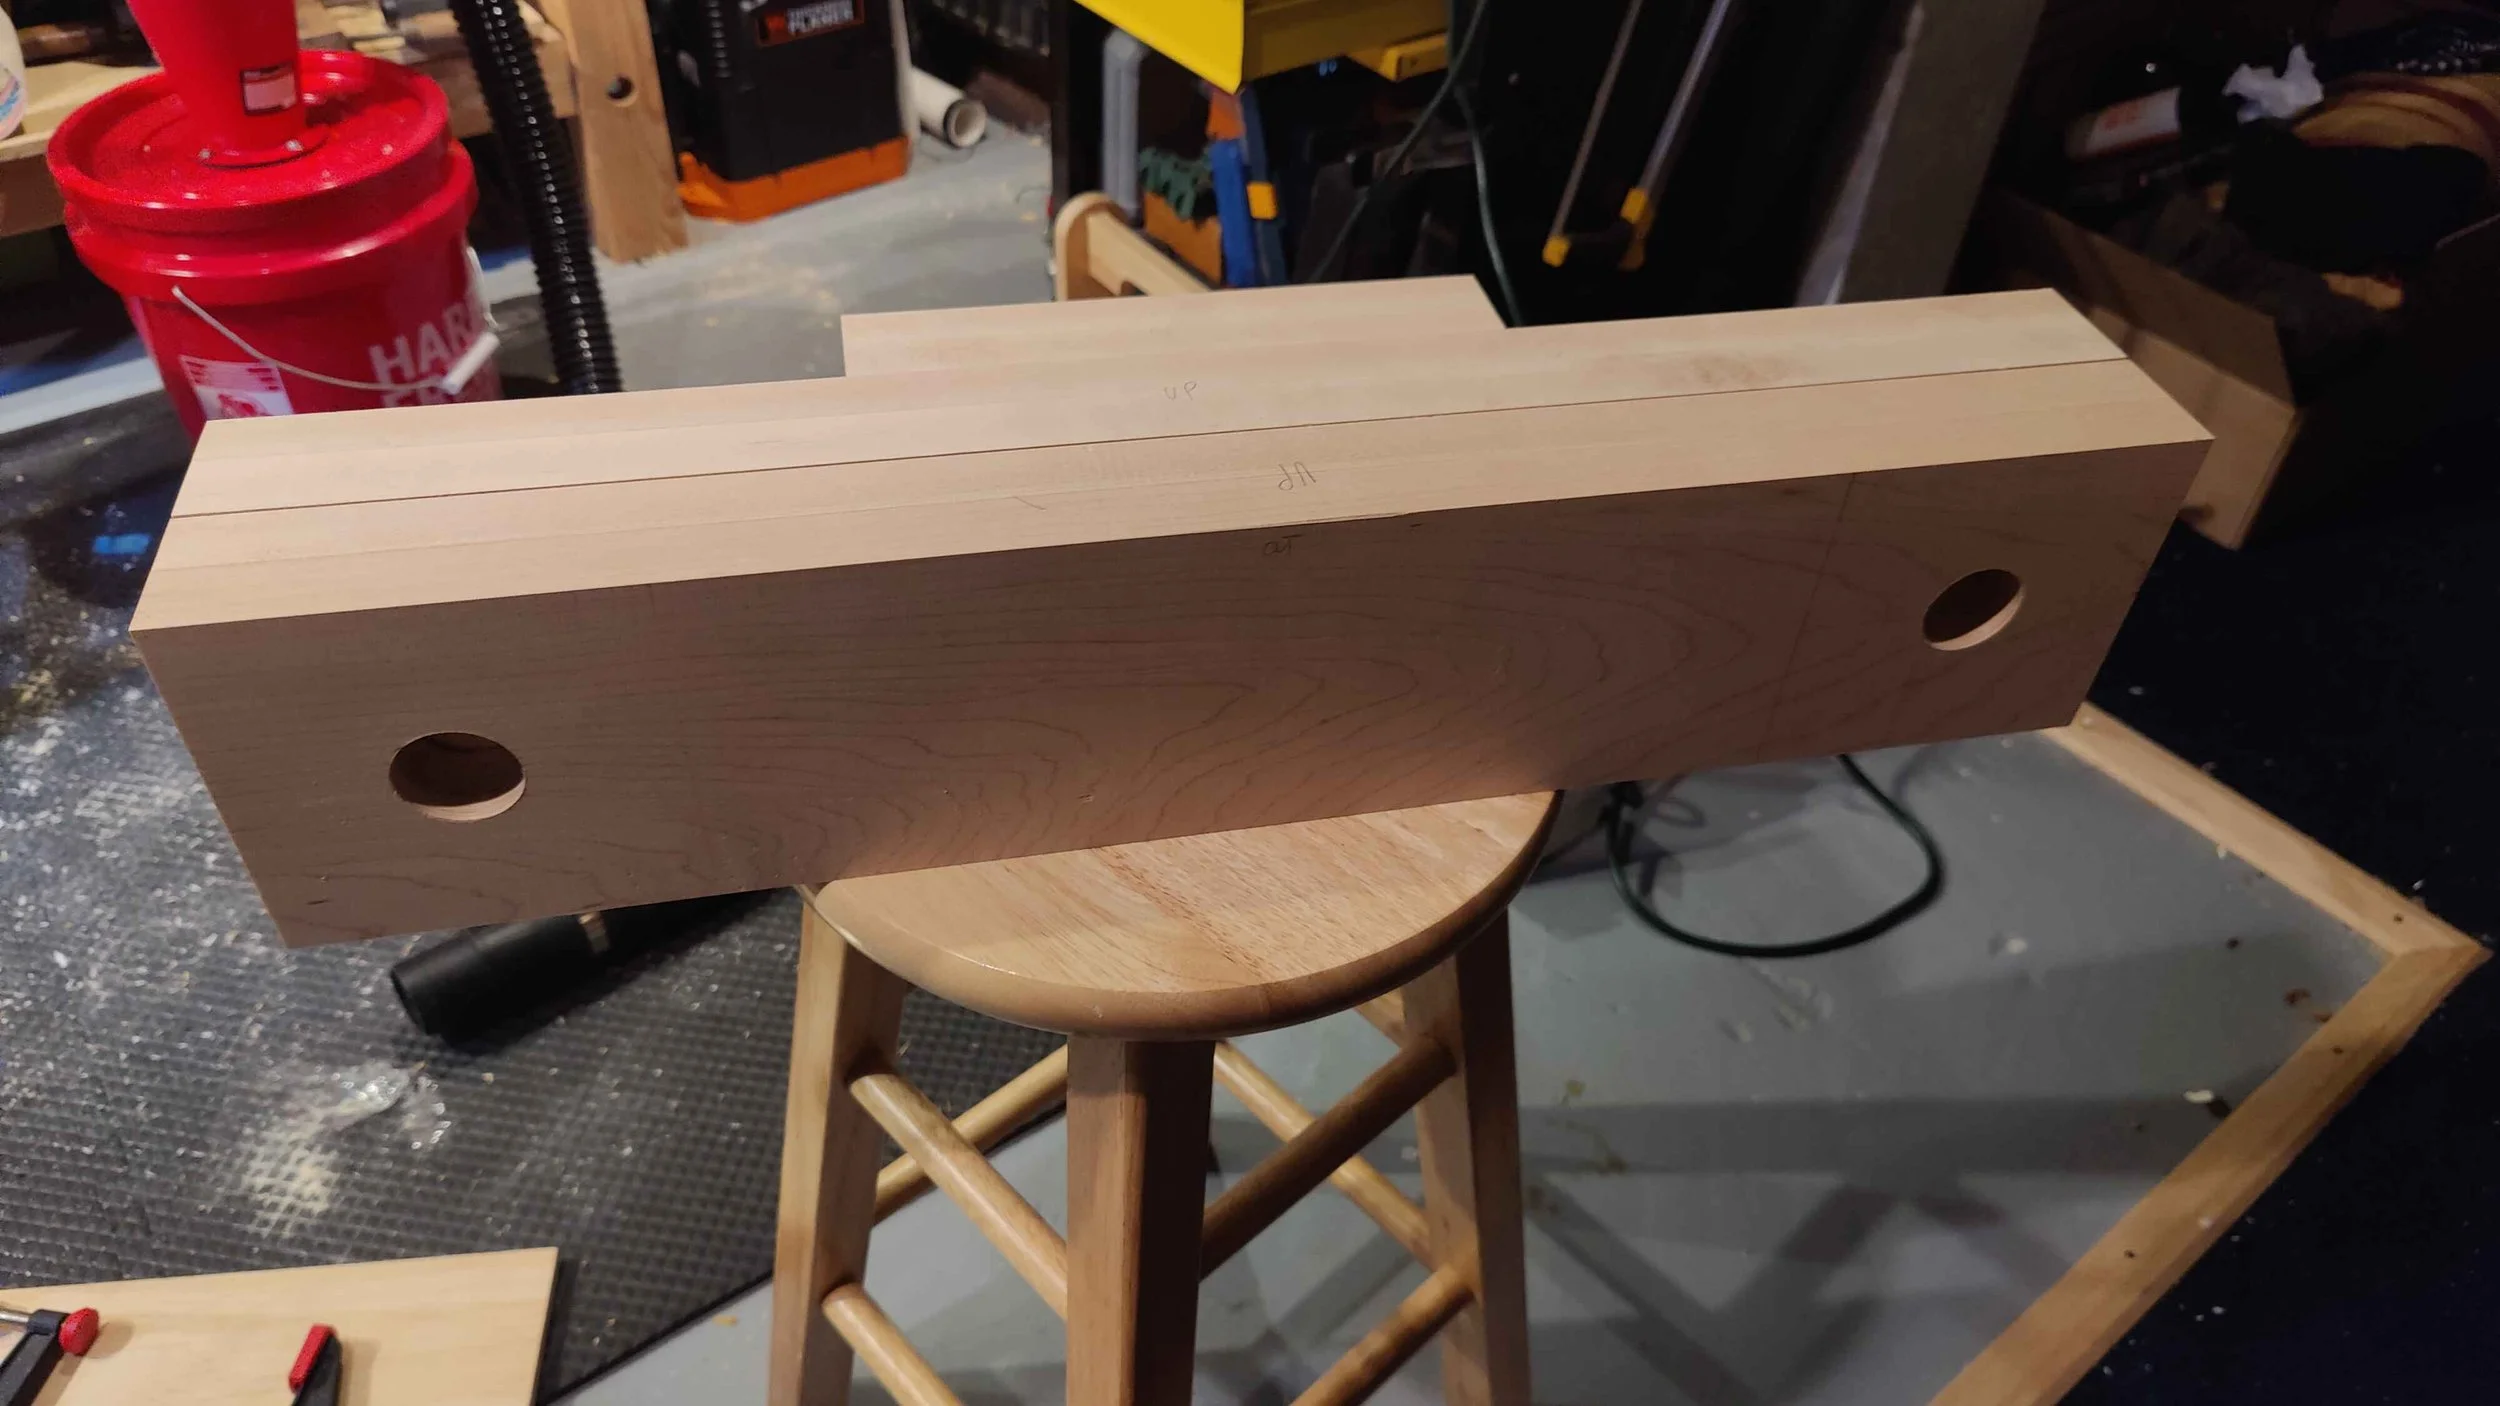
Prototype press faces. Plough faces behind.
I even sent away and had parts manufactured out of resin to prove concept.
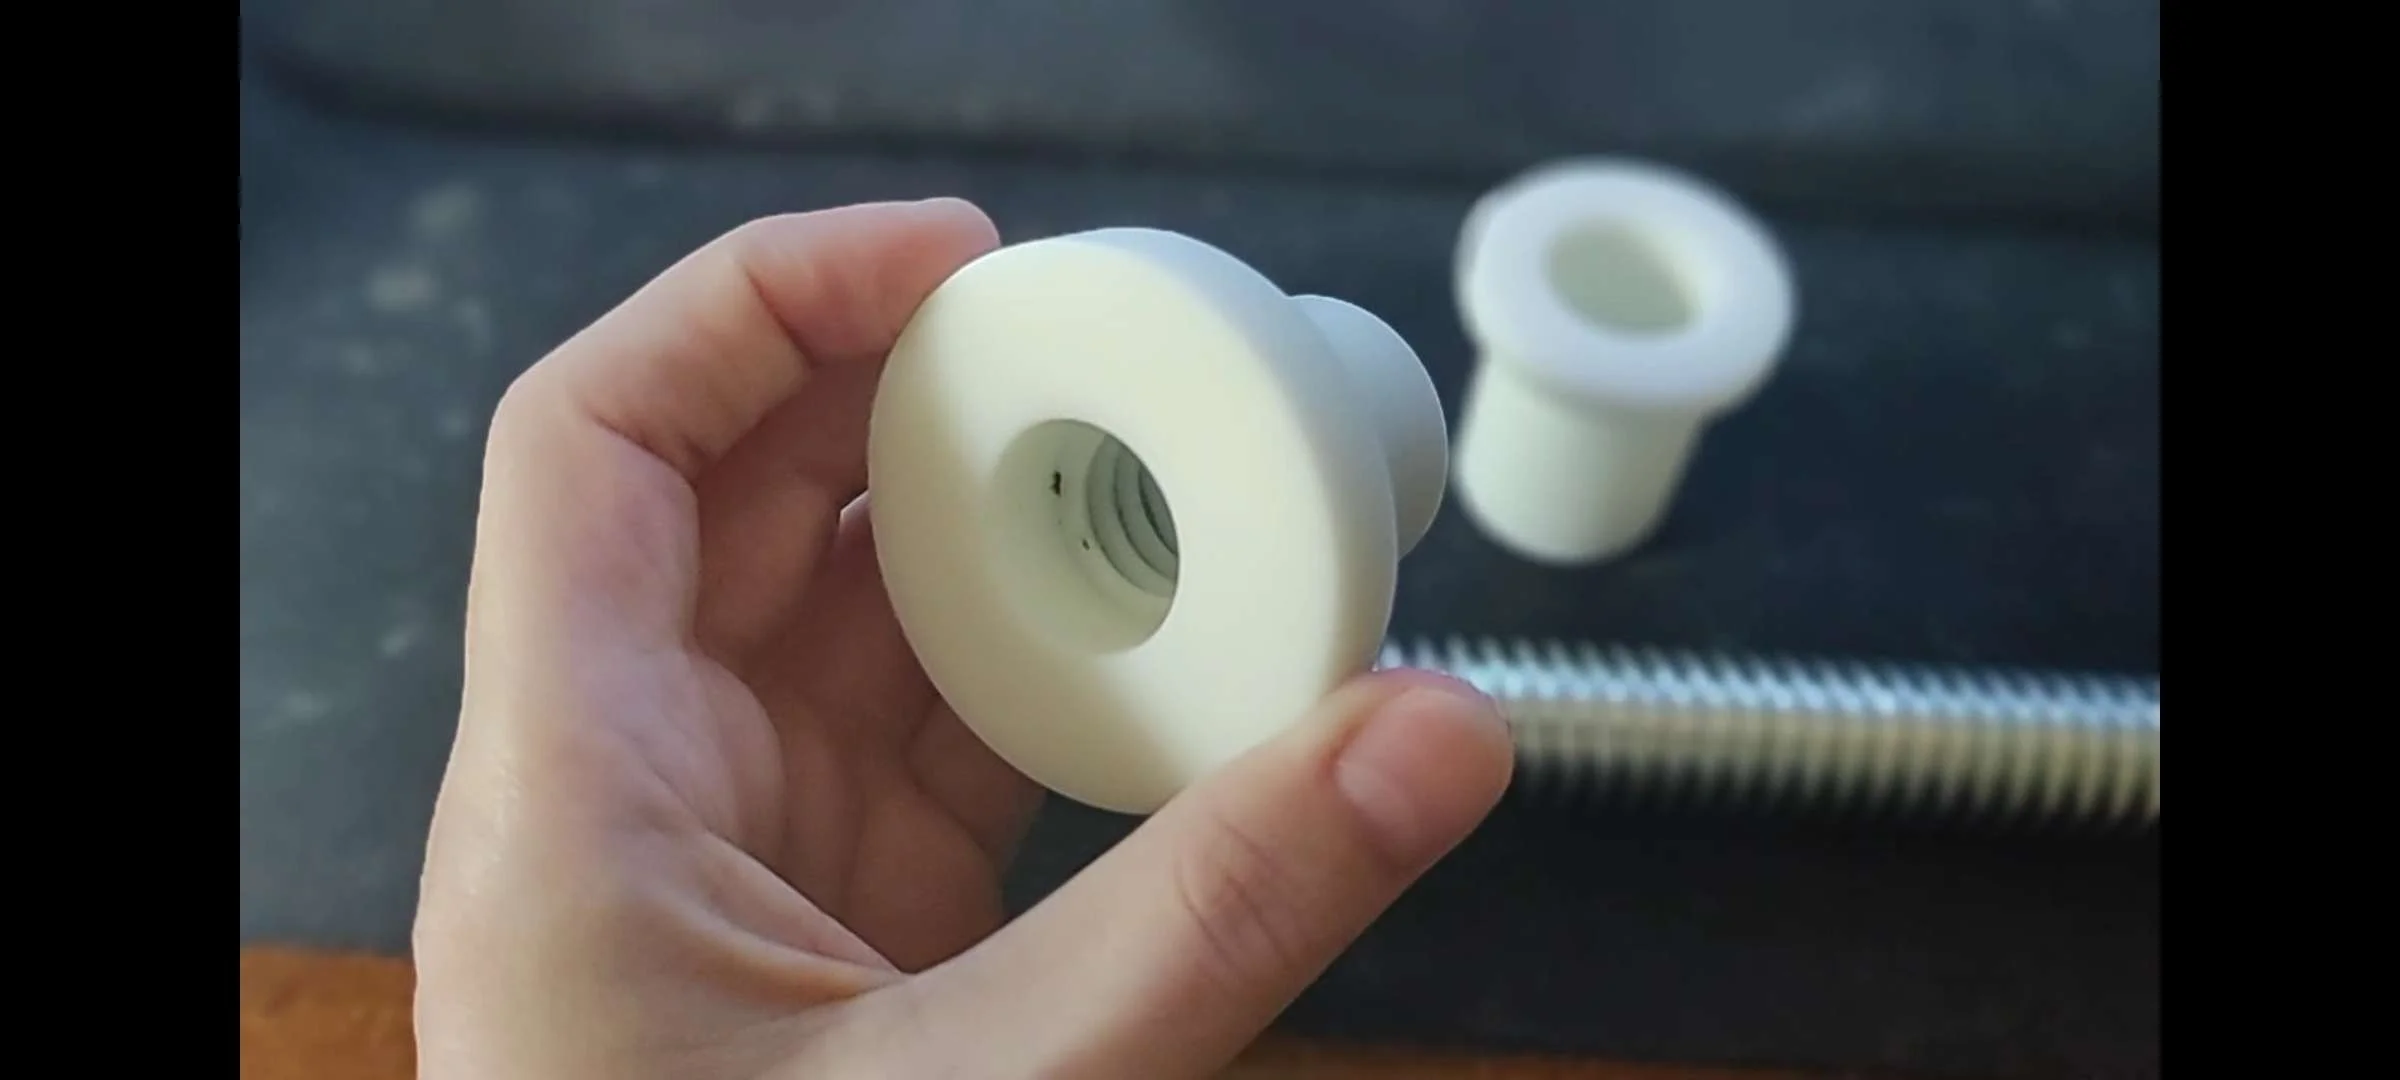
My first Delrin prototypes.
I was ready to show my work to the public. I bundled together all the relevant project information and sent it to the community.
I reached out to three of my favorite YouTube bookbinders with my packet to see what they thought. They each responded thoughtfully, and laid out their cases. The screw, bushing and nut couldn’t be resin, and would need to be metal to withstand the intense vice-like forces the press would be under. The tying up pegs weren’t necessary. The face would need to be captured, as moving the free face by hand was undesirable. The press was also too thin front to back, and would need to be thicker for better support.
I stewed for a while, because I thought I was done and now I had a whole host of new design challenges. How would I capture the face of the press with our new metal bushings? How could this be affordable to make with complicated, custom metal components?
Almost immediately afterwards I was laid off from my graphic design desk job and lost my health insurance. The job market for me has always been a dismal hellscape, but 2025 was a different beast altogether. As of December 2025, I’m still looking for a new job.
I left the project alone for a few months, I was burned out and had been working on iterating the design for almost 18 months on-and-off.
In the end of October 2025, I began having intense abdominal pains. A few short days later, my gall bladder exploded, landing me in the emergency room. Emergency surgery and a week in the hospital remedied my body, but left me with a substantial $10,000 bill.
While I recovered, my mind wandered back to my designs and I believe I’ve honed them to a finally finished state. It has strong, metal parts where strength is needed. It has beautiful, timeless wooden faces, and everywhere else I take advantage of modern technology with 3D printed acetal resin.
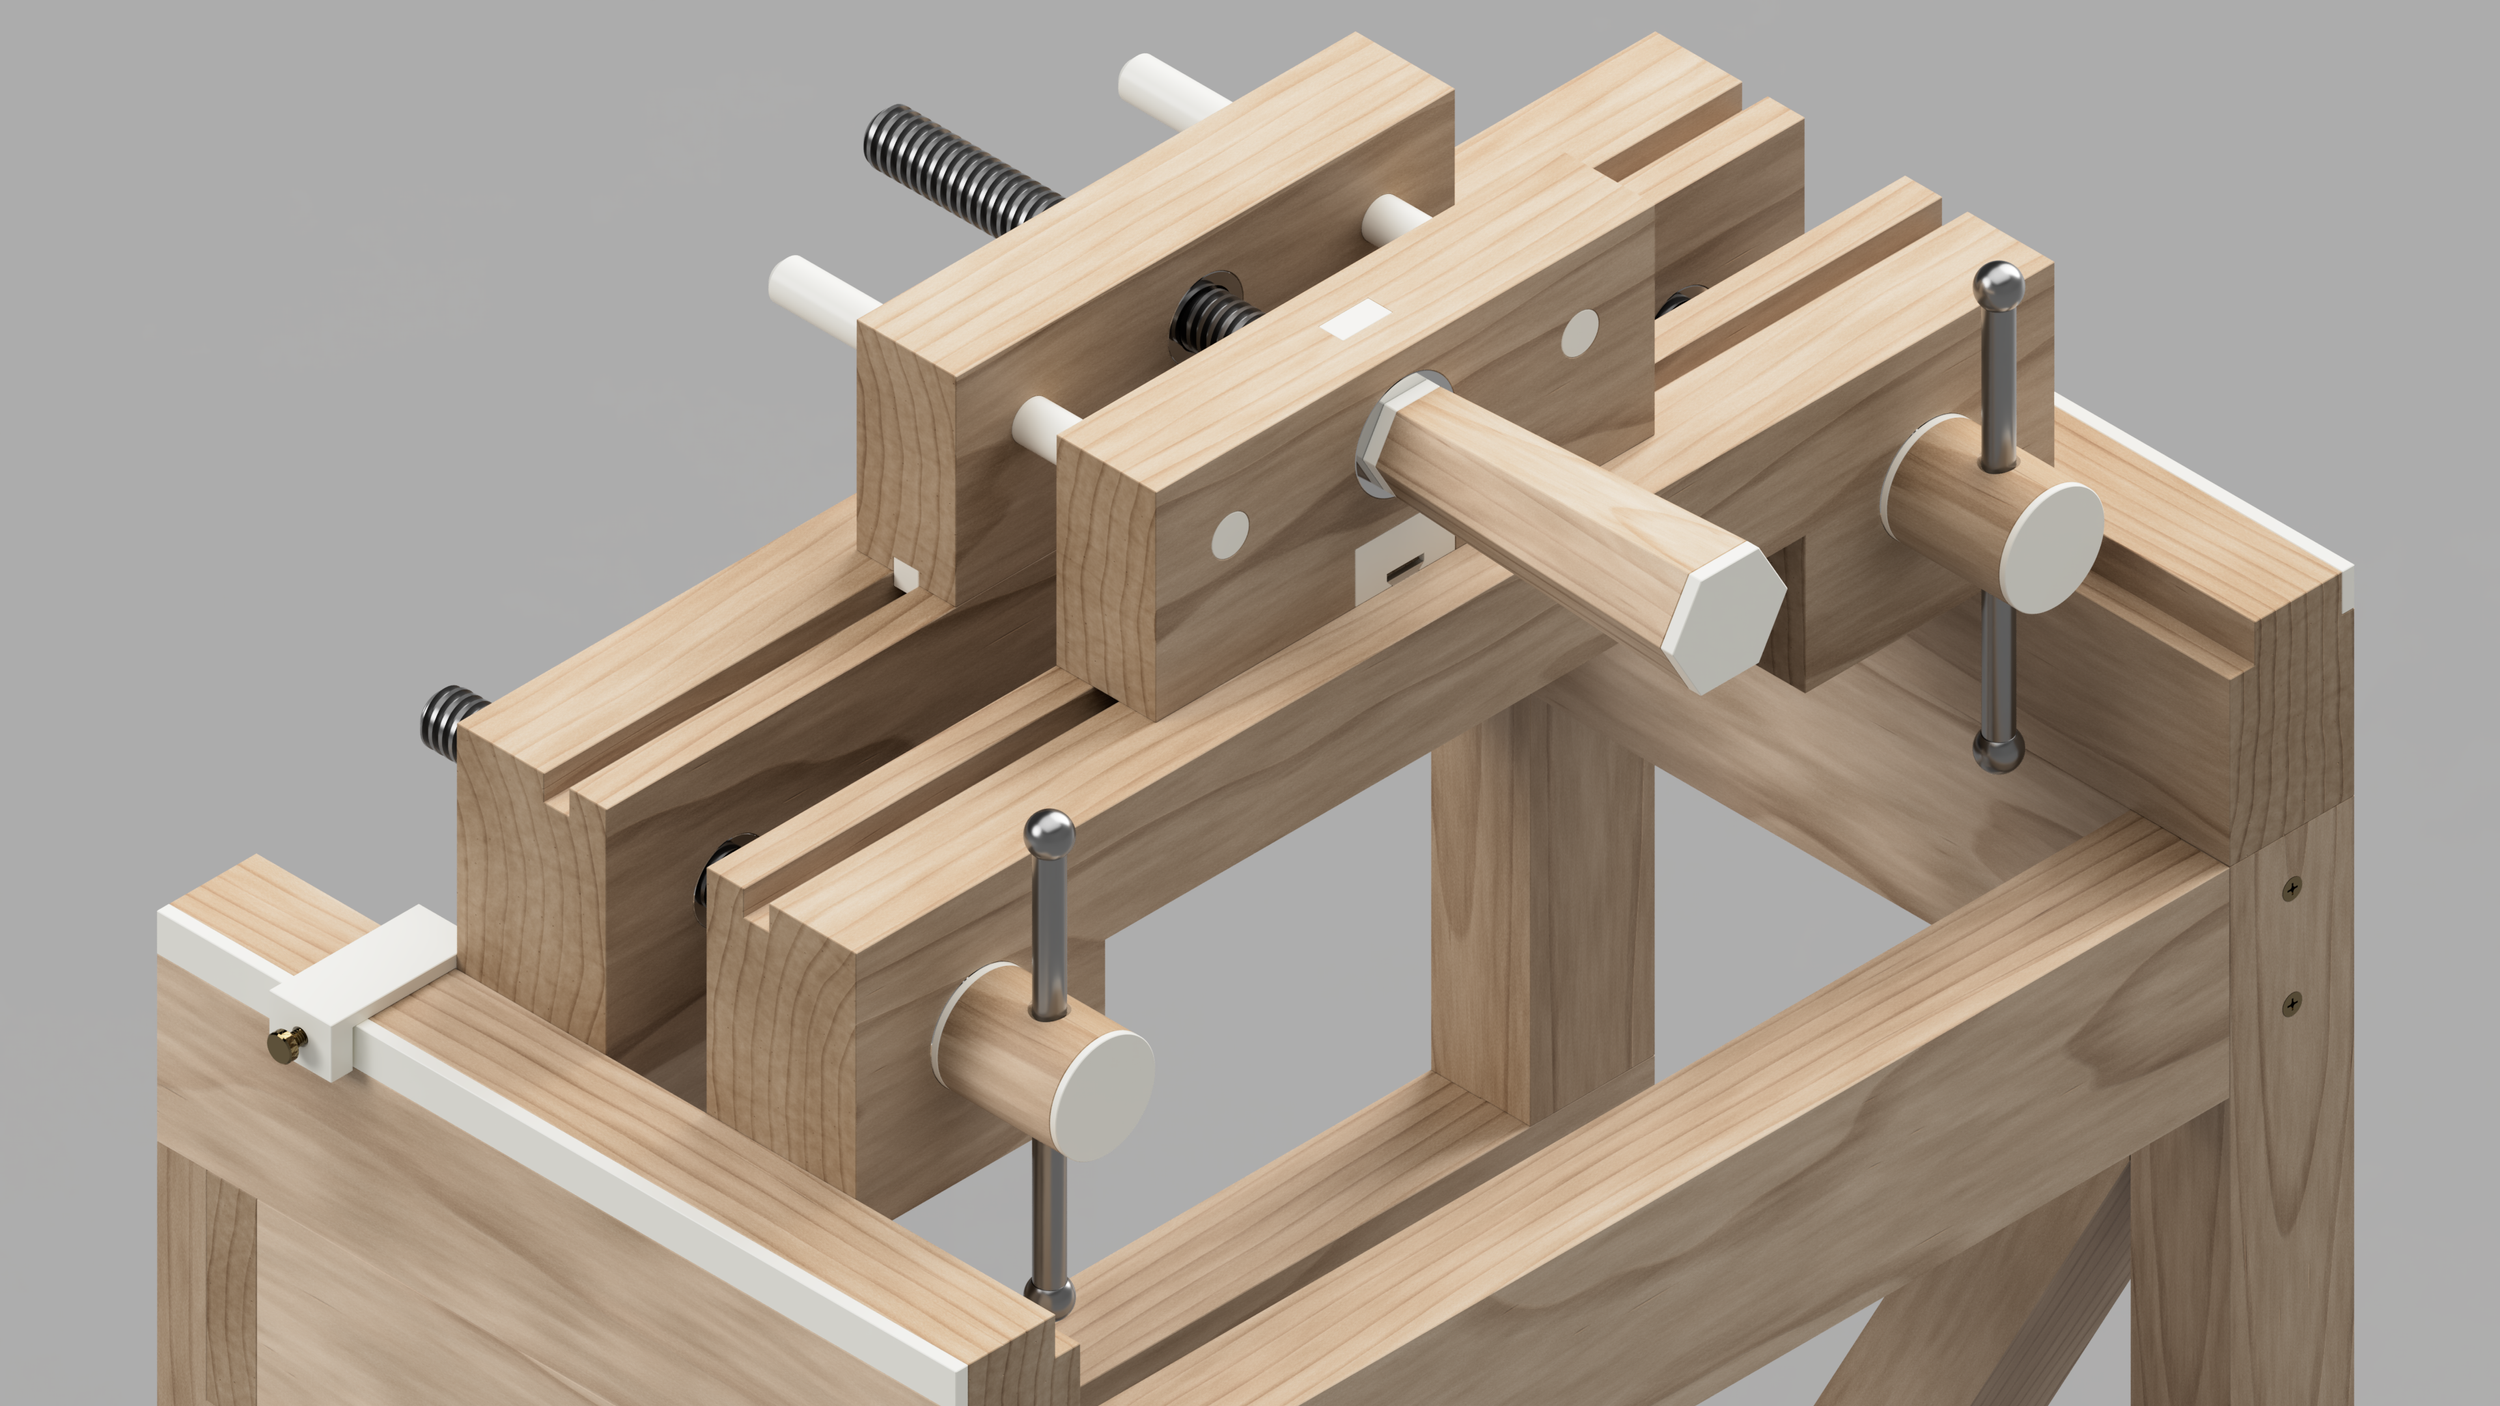
The final Sage Tools Combination Finishing Press, Plough & Basin.
Now all that’s left is to put the finishing touches on it, and for that I’ll need your help.
I have detailed blueprints and drawings for each of my parts, as well as .stl and .step 3d model files.
I need a CNC Machinist shop to build my parts. I’d prefer if they were in the US.
I can source the wood, and mill and cut it myself, but I’m always open to shop-talk. If you know a better way, I’d like to hear it.
I want to either 3D print the accessories from acetal resin, or find an economic way to have them milled or maybe injection molded. I could use help with this.
I need help marketing. I’m a graphic designer, so marketing isn’t entirely foreign to me, but I know when to ask for help. I want to get this in front of the people who can use it.
If you can help with any of this, please reach out to me. Let’s make this happen together.